
I was one of the first in the UK to obtain one of Fender’s 2016 Deluxe Nashville Telecasters. I had happened upon a promotional video for it on Twitter, loved how it looked and sounded and quickly discovered that Anderton’s, my nearest guitar store, would soon be taking delivery of a first shipment, so I bought it immediately, on line, unseen, on a whim. As soon as stock arrived, I drove to the store and collected mine.
It didn’t disappoint. The flatter radius fretboard, lovely fret job and eased neck heel made it a delight to play. It came standard with locking tuners and noiseless, stacked humbucking pickups, mounted in shielded cavities. That’s a professional specification, for working musicians, at quite a reasonable price. This guitar is a really solid workhorse. In use, it was always whisper quiet, but with a range of tones that put a big smile on my face, every time I played it. This instrument rapidly became a favourite. Finished in Daphne Blue, what was not to love? The middle pickup voicing, in particular, was very much to my liking.
Unlike the usual Telecaster configuration, this Nashville model has a Stratocaster pickup in the middle position, with a five way selector switch. Apparently, this was a popular modification among the Nashville guitar playing community and Fender had released this model, made superbly in Mexico, to satisfy a perceived demand. To my ear, this combination of pickups is exceptionally versatile. I could see why session players went for it in a big way.
I played this guitar regularly for over a year. The more I played it; the more I liked it. Imagine my dismay when, during a jam session, the middle pickup, without warning, got quieter and quieter, eventually reducing to nothing, over a period of about an hour. The slow failure was puzzling. Electrical things usually fail suddenly. The fact that this pickup had faded out slowly made me think magnets had come adrift, or that I was dealing with a cold solder joint that broke slowly. I finished the set with just the bridge and neck pickups working.
Perhaps the switch solder terminals were shorting to the conductive paint in the control cavity. There isn’t a lot of clearance and the middle pickup terminals sit deepest in the routed slot. My first theory proved not to be correct. The terminals were clear of the shielding. Nothing was touching.
I also inspected the solder joints on all of the control connections. The soldering was exemplary. That meant the problem had to be in the middle pickup itself. If I was lucky, a flying lead solder joint had come adrift. The worst case scenario, though, was a broken winding, deep inside the coil. That would mean a rewind or a replacement.
Access to the middle pickup requires that all the strings be taken off (and discarded, because it is very difficult to restring locking tuners, after the strings have been cut to length and tuned to pitch). There are eight screws to remove, to raise the pick guard, which the middle pickup is mounted within.
I looked on line for replacement parts. Nobody stocked this particular middle pickup as an original Fender replacement part. There were sets of three noiseless Stratocaster pickups available, in “vintage” and “hot” variants, but they came with white covers, not black (which was what was in my Telecaster). These sets were marketed as standard Stratocaster upgrades (a modification I would highly recommend, incidentally). It would be an expensive, wasteful option to buy a set of three and use only one.
Seymour Duncan offers two different strength stacked humbuckers, as after-market upgrades, but they were around £80 and nobody seemed to hold stock of either the vintage or hot models. It would be an “order and hope” situation, the pickups looked different to the original and I really liked the voicing of the Fender middle pickup, so replacing it with a Seymour Duncan would be a last resort, for me. Too many unknowns. I would also find myself buying a second guitar of this same model as a backup, if I could only repair the original with a non-standard part, I was sure of it. That would be too darned expensive (even though I fancy the Fiesta Red one).
I considered trying to get my ailing Telecaster repaired under warranty, but that had probably lapsed anyway and in any case, it would mean sending a favourite guitar away, to be handled by brutal couriers twice and worked on by hands of unknown competence, or else swapped out for a different guitar of the same model, which sometimes happens. I had already played this guitar in, it had a reasonably early serial number (for its model) and I didn’t fancy starting again or taking the risk of flirting with potential shipping damage. Warranty repair wasn’t an attractive option, even if the limited lifetime warranty did cover this manufacturing defect that had taken quite a while to show itself (I don’t know. I never delved into the terms and conditions and didn’t relish having to potentially fight for my consumer rights).
With the pick guard free, inspection of the pickup terminals revealed that the flying leads were sound. The magnets hadn’t moved at all either. Measurements of the DC resistance of each coil revealed that one of the coils was open circuit. That was very bad news. It meant that the fragile 42 AWG enamelled magnet wire that is wrapped around the pickup’s bobbin former, thousands of times, was broken somewhere.
I’d encountered this problem once before, on a Fender Telecaster. My friend’s Telecaster bridge pickup had an open circuit coil. On that occasion, the tail out of the coil had broken. Unwrapping a single turn of the pickup winding and soldering it back onto the pickup terminal was all it took to get it working again. It was a simple fix and it never went wrong again. You needed a steady hand and sharp eyesight, but it was fixable. The hardest part was baring the copper wire, scraping away the enamel insulation. It was a very delicate operation and the enamel coating was very tough.
It’s not clear why a winding should snap. Perhaps the wire had a kink or partial cut in it at the factory. Maybe it was wrapped too tightly and failed due to contraction in cold temperatures. Maybe it was metal fatigue. Who knows? In my stacked humbucker, it could have been any of these, with the wire thinning and breaking slowly, perhaps explaining its sonic fade, over the course of an hour. All I knew is that it was nothing I had done to it. The pickup. Just. Failed.
So, late at night I found myself looking for a broken winding tail. Almost unbelievably, I found it! The broken winding tail had come away from its solder terminal and had been resting on the bare solder joint. That meant it would sometimes make electrical contact and sometimes not. This is why it faded out! The wire was making only partial electrical contact.
Unfortunately, while there was just enough wire length to resolder it to an adjacent, but electrically common terminal, there wasn’t much room to bare the copper wire. My eyesight is not as good as it used to be, now that I’ve reached middle age, but I have magnifying glasses and reading glasses. I could see the problem well enough to work on it. The problem was that stripping the enamel insulation was very difficult, given the space and wire length constraints. I tried resoldering it and it seemed sound, but the DC resistance reading, while lower than before, was still indicating a break. I tugged on the winding tail with some very fine tweezers to test the integrity of the solder joint and found, instead, that the magnet wire broke very easily again, leaving about 3mm of wire in my tweezers. At this point I was sure the winding wire had sustained more damage than where it had first broken, because it had now broken twice and very easily.
I could have searched for the now shorter tail, taken a wrap of the coil off and tried again, but I had no idea if the damage to the magnet wire was more extensive, or if this was the start or finish of the winding. If it was the start, I was in trouble. There would be no easy way to take a single turn of the windings off, to lengthen the tail. The start of the coil would be buried by thousands of turns of subsequent windings and there would be practically no way to take a turn off, to lengthen the tail. It would be rewind time.
On the other hand, even if it was the winding finish tail, it was evidently more fragile than usual. I could more easily take a single turn of the coil off, to give myself a longer tail to work with, but every time I reconnected it, there might be a new break further along. I had no way of telling.
Stacked humbuckers are finicky things to work on at the best of times and I felt I was getting in over my head, as I do not have the machinery or tools (or experience) to rewind a pickup. In my youth, I had adapted an old record player for the purpose of winding coils and had wound a single coil pickup with it, but it was a very slow process (33, 45 or 78 rpm), requiring tensioning and feeding the magnet wire by hand. I also had to count the windings in my head, as I had no mechanical counter. Tortuous.
The windings on my varnished cardboard bobbin hadn’t turned out very tidily and that jury-rigged machine was long gone anyway. Even though the pickup had worked and sounded OK, using a pair of ceramic kitchen cupboard door latch magnets to magnetise the strings, the exercise made me appreciate how skilled commercial pickup winders were at what they did. Scruffy winding leads to poor frequency response and microphonic feedback. My home-made pickup had both. A well wound pickup coil is truly a thing of beauty. Very few people get good at it.
Consequently, I took a step back to consider the problem carefully, rather than making things worse, through a bull-headed attempt to fix it at all costs, made in unnecessary haste. Age teaches you these things. Keep calm and think things through.
Searching online for pickup rewinding services, I found Armstrong Pickups in Kent. Their repair charges seemed reasonable. I understand this was renown pickup maker Kent Armstrong’s business, but that it was now run by his son, Aaron. Sending my pickup to someone who does more of this kind of work, day in and day out, seemed like a better option. Consequently, I opened the control cavity again, snipped off the pickup connecting wires from the selector switch and volume pot and removed the pickup from the guitar.
Next day, I spoke to Aaron on the phone and he agreed to take a look. I indicated that it might be rewind time, but he said he’d see if he could fix it without a rewind. I posted it at the end of the week, holding the black cover back, in case I had to buy a set of three noiseless Fender pickups and swap a white cover for the original black one. I was honestly expecting the worst.
Within a week, the pickup was repaired and back. It had been the winding finish tail that had broken after all and Aaron had been able to take a winding off and reconnect the tail to the solder terminal. It was working. The postage there and back cost more than the repair and much less than a new Seymour Duncan replacement pickup. Best of all, the voicing of this pickup was not substantially changed. One winding fewer, in four or so thousand, is negligible. The original pickup was back.
Reinstallation was a simple matter of two solder joints and reassembly and restringing of the instrument. I plugged it in, tuned it up and heard beautiful music once again. Bliss!
The moral to the story is that sometimes, the right approach to repairing a favourite guitar is to chicken out, accept the limitations of your experience, skills and tools, no matter how good you imagine they are and let somebody match-fit do the intricate work expertly. Rely on a trusted specialist.
If you have intricate pickup problems, I can’t recommend Armstrong Pickups highly enough. They’re amazing. Professional and prompt, they sent the unit back even more carefully packed than I had sent it to them – and I had used a bubble wrap bag, a cardboard box and a padded envelope! (they had added styrofoam packing beads) I’m a very satisfied customer.
Here is the photographic documentation, starting with my guitar looking sad, because it’s middle pickup doesn’t work (you probably can’t tell it’s sad, but I can, obviously 😄):

Detuning and unlocking the strings is very easy with Fender’s locking tuners. I like to use a magnetic mat to keep all the screws I removed, to take off the pick guard, in some kind of order.

Lifting the scratch plate reveals conductive paint in the body cavities to shield from electrical noise. The silent middle pickup has the black and white flying leads, closest to the neck in this picture. At this point I knew that a winding must have broken, as the solder joints and magnetic structure of the pickup were exactly as they should be.

Measuring the DC resistance of the two windings showed that one was open circuit. At 5.95 kOhms per coil, we can assume the DC resistance of the working pickup would be around 11.9 kOhms, indicating that it’s a “hot”, rather than “vintage” unit, according to Fender’s own web site.

Verifying the measurement, to be sure, because the guitar is advertised as having vintage pickups. I’m fairly certain this one has hotter pickups, at least in the middle position.

Having removed the plastic cover and untaped the coils, you can see the two windings. The correct termination of winding tail to solder terminal can be seen clearly. Now you know what’s inside a Fender Noiseless pickup (thereby no doubt voiding the warranty, for all that that is worth, I’m sure. If they had been made correctly, they wouldn’t have broken and I wouldn’t be trying to find out why!)

If you look very carefully at the wire link joining the two solder terminals, you can see the broken winding tail just above the right most terminal. This wire had been resting on the solder joint, but not connected. It appears here, having entered up through the hole above and between the two wire linked solder terminals. There’s only about 3 or 4 millimetres of wire to play with.

Here is my attempt to resolder the wire to the terminal. It was not successful. When tugged gently, it broke where it comes up through the hole, from the other side of the insulator. This is the point at which I chickened out.

With the pickup removed and the repaired pickup returned, I was ready to reinstall it.

A view of the resoldered terminals on the repaired pickup:

Here is the other side of those resoldered terminals:

Here is the pickup, screwed back into its mounting screws.

Time to desolder the remnant of the snipped white wire on the pickup selector switch. I use a hand-held desoldering pump. The wire has been wrapped through and around the lug hole, for mechanical strength, so is harder to clean up.

I don’t have a soldering iron hot enough to desolder the snipped black wire attached to the volume potentiometer back, so I trim it off with side cutters. My iron goes to 450 degrees F.

I bare a little more of the black wire, for attachment to the volume pot. I tin both with solder, having run them through the body cavities correctly.
Once they have some solder on them, these wires will be easier to solder to their respective controls.

The iron had just enough heat to to solder the black wire to the other side of the volume potentiometer back. Not ideal, because star point earthing is better, but adequate.

The white “hot” wire was then soldered to the cleaned up switch lug.

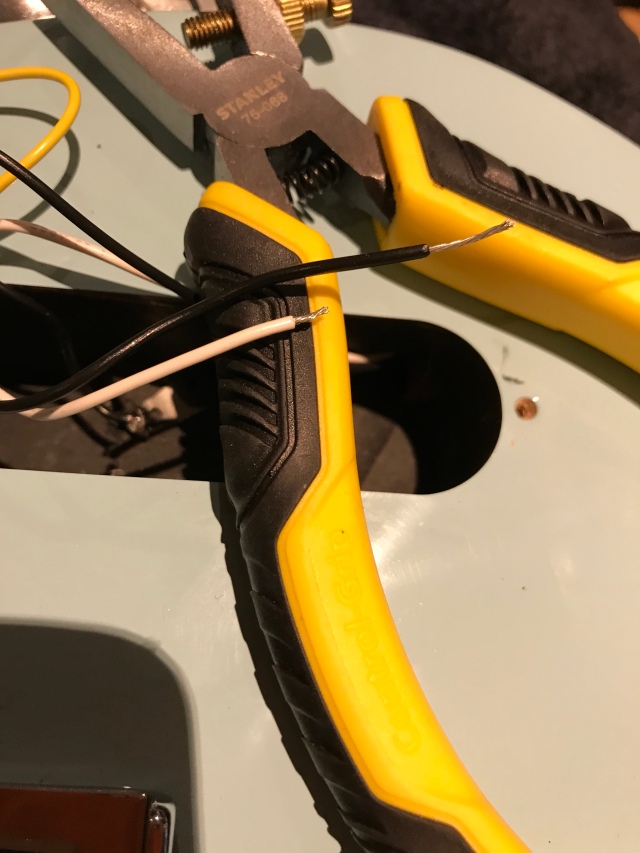
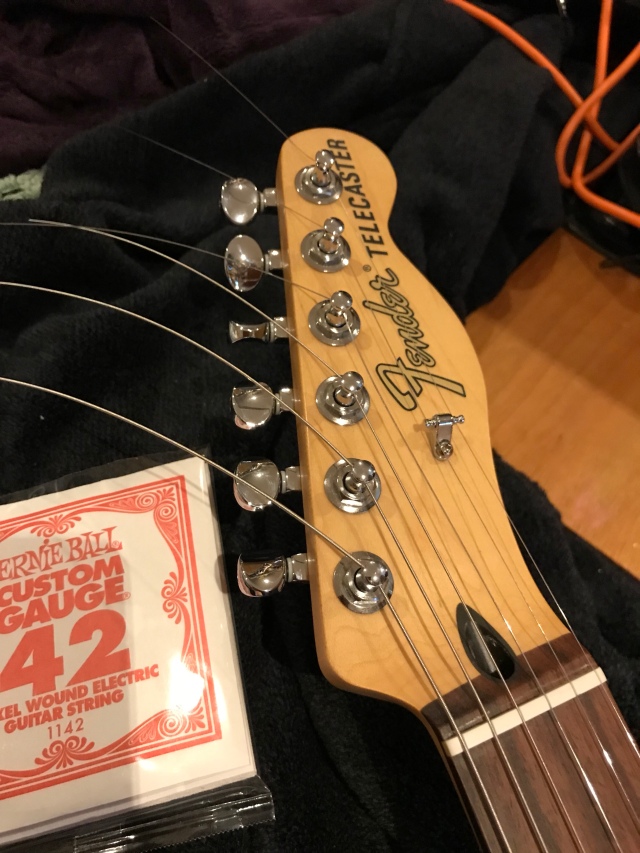
With the scratch plate and control plate screwed back in, its time for some nice, new strings.

Here they all are, locked down, ready to be trimmed to length and brought up to the correct pitch. A small pair of diagonal cutters does a nice job of cutting the strings to the correct finish.
And finally, all tuned up. I used Fender’s free online tuner, this time. The Gieson tuner I usually use returned error 403 this time. Maybe it’s broken. Finally, a play through my lovely little Orange desktop amp and all is well.
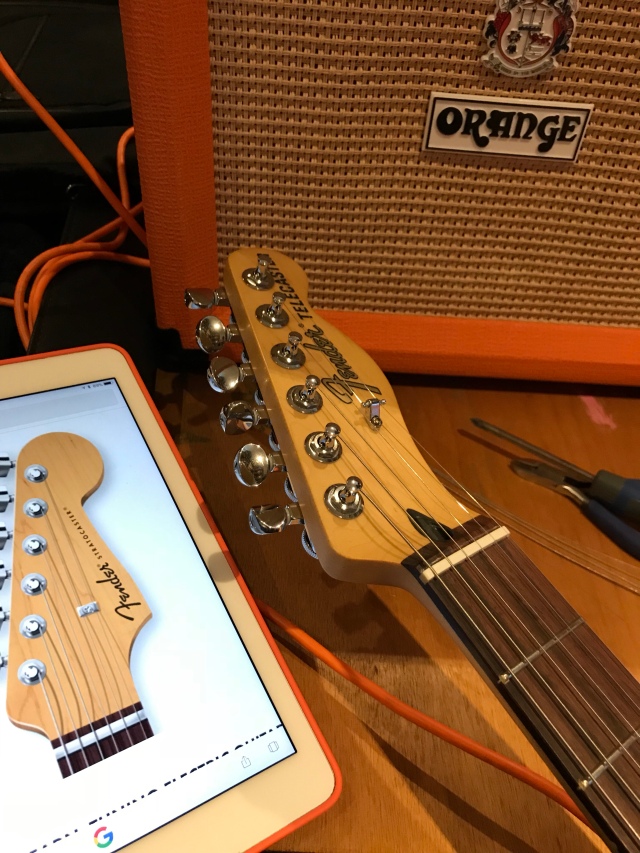
Turned out nice again, thankfully.
